This article is part of the "How to Get Real Work Done on an iPad" series. To go to the start, click here.
Alongside writing and spreadsheets, design - specifically Photoshop - is the top reason why many people feel they can't abandon a laptop for an iPad on the road. So let's be fair, real designers won't get much serious work done on the iPad. You will quickly bump up against the limitation of the apps. You probably want a bigger screen and finer control that the touch screen gives you.
For anyone else who has more modest design needs - something to quickly produce graphics for articles or do some simple photo editing - you can use an iPad for everything and not have to pay out the fees for a Photoshop licence.
That's exactly how I do it. My requirements are nowhere near professional graphic designer. I would say I am a "power user" or - to be more humble - "advanced beginner" because I read a book and some websites on design. These needs are,
- Graphics and photos for articles and social media (mostly from stock images).
- Cropping and resizing photos for the web.
- Meme style images.
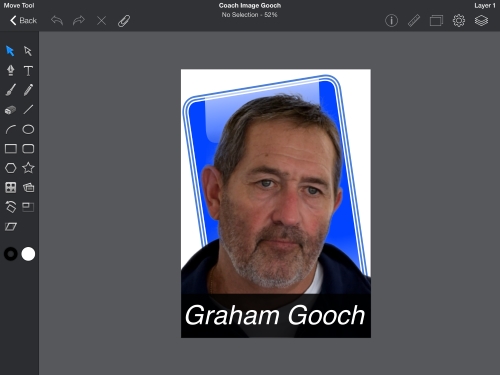
- Simple website graphics such as banner ads, landing page graphics, coach images and so on.
Here are the apps that can get these jobs, and much more done.
Canva: totally cheating
Canva is a cheat. It's a graphic design app for people who can't design but know the difference between something that looks good and something that doesn't. It does it by giving you a bunch of templates to play with. That's a good thing if you are not great at design because you can stick to the template, create a good design and get it out of Canva. They even include a large database of assets you can drop in. This is ideal for all kinds of things: Facebook and twitter posts, posters, infographics, banner ads and anything else where text, images, shapes and icons are found together. Here's a graphic I recently designed and used:

Once you choose a template you can change it by moving, adding or removing assets as you like it. You can add filters to photos (the blur effect looks great behind text). You have a big choice of fonts and a massive choice of lines, shapes, colours, backgrounds, icons and stickers. There are stock photos to use or you can upload your own. The strength is that it's all in the app so you are not grabbing images from Dropbox or the camera roll. Some of the resources are free, while others you pay a small fee (about $1) to use in your design for a one off use. This compares very favourably with stock image sites. So far I have not created anything that cost more than £1.25 and most designs I have done have been free. You can easily pay £5 per image and more on stock sites.
Basically, you can play with it until you get something nice. It won't take long. It's like cooking a frozen pizza. It will still taste good even though you have not needed any chef skills to make it. A real chef would make it better for sure but you are prepared to compromise for convenience.
Of course there are limitations,
- You can't draw your own resources in the app, you have to use the provided ones or make them in something else and import them.
- As it doesn't support iCloud Drive, you end up with the old issue of having files in multiple places.
- As it doesn't support Dropbox either, I have to do a little dance of exporting to photos first before putting into Dropbox for hosting, thus leaving a trail of images behind.
- You can't use custom fonts. The choice of fonts is great but I sometimes want to use one not in the list and get stuck.
- Designs rarely move seamlessly from the web app to the iPad app, even though they are linked. As the web app is more flexible I find myself using that more often but then can't continue on the iPad.
These limits aside, I like to use Canva. It's my first app to choose to knock up a quick article graphic in a few minutes using the provided images and fonts. Then I can export the file to Dropbox and copy the link into Editorial (see above).
I have not thought of a way to prevent the "multiple copies" issue, so I have a recurring task in my task management app, Todoist, to clean this up once a week. As all my images are auto backed up to Dropbox with the excellent "Camera Upload" feature, I can be liberal with the delete button.
Big Boy Images: Pixelmator, iDraw and Photoshop Touch
When you need more power and flexibility in design, the iPad can handle it smoothly with these powerful tools. All three are close to desktop class. These monsters are certainly more that I need and I would guess that even professional designers and photographers can create without feeling too hindered. We are moving from cooking frozen pizza to making a gourmet meal. As the three are similar with slight differences I have put them together.
iDraw
iDraw is a tool for vector illustrations. You can design logos, icons, wireframes and all the usual vector stuff with a ton of shape options. You can also use it for image design as it has a lot of Photoshop style features previously only on the desktop,
- Layers
- Pen and brush drawing tools
- Powerful text tools with custom fonts (alongside AnyFont)
For a while it was the only real option for graphical work on the iPad, so I took the time to learn the basics and it's paid of with some better designs that I used to get on a desktop. The Retina screen is a huge benefit for that, and as a non-designer I didn't have access to Photoshop on the desktop, this was a step up.
Unlike Canva you have much more flexibility. You can export the files in lots of formats from the native .idraw through .psd and .pdf to .jpg at up to 300dpi. The share options are numerous,
- Import and export designs from and to Dropbox directly (no camera roll stop off).
- Export all over the place; email, photos app, social media, a direct print, and - through the share sheet - Evernote.
- It has a share sheet option in other apps so you can open images straight into iDraw.

A lot of my work has moved to Canva recently, but I still use iDraw in the times I need to use something a little more custom, especially around text or annotating an image. I'll also gravitate towards it if I know I'll need to export somewhere else as it's much easier.
Photoshop Touch
Anyone who says you can't do Photoshop on the iPad needs to be gently nudged to the App Store to see Photoshop Touch. It's by no means the full PS experience but it is a lot more powerful than the naysayers imagine.

It does the layers thing, let's you draw freehand, crop and resize photos, add effects (from ugly filters to elegant tweaks), add text with custom fonts, blend photos together and even add or remove objects from photos.
I use it mainly for the cropping and resizing, and the feature that lets you remove the background from an image. There are a few apps that do this, including Adobe's own Photoshop Mix, but Touch does the best job.
It even comes with a bunch of tutorials to help you learn the tools and interface. You'll need that because Adobe have employed indecipherable icons in a nonsensical menu layout. It's all there but hidden until you get used to it. I still have not mastered it fully but I put that down to lack of experience with PS in general. For example, I can add text in any colour or font I like to a layer easily enough but I can't work out how to add effects like a drop shadow. I also can't work out how to change or move the text after it's been added. I'm happy to admit this could be me floundering about in a difficult interface, but it certainly puts me off using it as it's not as easy as other options.
You can import images from the camera roll with the share sheet, or open from within the app, but not straight from Dropbox (another camera roll stop off). If you want to discover images to use, you can find royalty-free images on Google with a built in search feature. I love that as I use a lot of stock images. With this feature you can quickly find something at low or zero cost.
You can export your work as a .jpg, .png or .psdx file to the camera roll (and have another copy). It's supposed to support opening in Dropbox through the share sheet but It has never worked for me. I tap the share button, choose Dropbox and I am returned to the menu with no action. There is also an option to export to Creative Cloud (Adobe's sync service) but without using the desktop version there's no point.
As a non-expert, Photoshop Touch feels more like a proof of concept rather than a useful design tool. It has some brilliant moments that make it seem like a desktop class app, then it makes life difficult (like the interface and the export options) which puts me off. I see it as a utility app that is good to have around in case I need to do something unusual with an image.
Pixelmator
Pixelmator is a recent, and welcome, addition to the design app world. They have had a Mac app for a while and the iPad version takes a big chunk of it's versatility. It's very similar to PS Touch, so much so that you might find you only need one rather than both apps. The feature set is identical with everything from cropping to advanced use of drawing blending, layers, effects and text.
Pixelmator has the edge when it comes to interface, and import and export. I quickly took to the Apple style layout of Pixelmator and found simple tasks fast and easy to complete. After coming from PS Touch, this was welcome and shows what can be done with a touch interface. As an example here is how easy it is to remove the fielder on the far right from this sample image,

I tap "retouch", then "repair".

Then I smudge the player, wait about 10 seconds...

And he is gone!

With my team a man down, I can export the image. The options are excellent: I can use the new iOS 8 "open in app" to put it straight into Dropbox. That's ideal for me. If your needs are different there are options for opening in any app that supports images or just saving to the camera roll. Say, like I do often, you want to put the design straight onto Facebook and Twitter. The option is baked right in.
I'm still getting to grips with it but I want to use it more. Canva just has the edge on speed designing with all it's templates. I sense I will be better in the long run with a "proper" design app as, one thing is for sure, this is as full featured as I - and most people - will need for a long time.
AnyFont, WhatTheFont, Dafont and Coolors: Font and colour geekery
Fonts and colour palettes can make or break a design. It pays to know a few things about how to choose them and put them together for best results. Now, that is a world of insane geekdom and so if you want nice fonts and colours but don't want to get lost in the depths you can take inspiration (copy) from existing designs and try to match in your design. All art is theft.
It's another cheat, but a cheat that doesn't take a lot of work. Here is what I do for fonts,
- When I see a nice font or font pairing that are unnamed I'll use the WhatTheFont site to investigate and get something close. Often this leads to a paid font which is not in my budget. If I know the font names, I'll skip this step.
- I'll try to find the font, or something that is free and equivalent using Dafont or Google Fonts.
- I save the font to Dropbox and install it using the AnyFont app. This adds it to the iPad and gives me access to the fonts in iDraw, PS Touch and Pixelmator (but not Canva sadly).


Remember that any fonts you install will not be carried over if you have to restore your iPad. That means you need to keep them around to reinstall. I keep all my fonts in Dropbox post-install for that reason. It's handy to note down which fonts are in which designs so save hunting about if you forget.
Colour palettes are even easier. I go to the Coolors site. It gives you a randomly selected palette designed but someone who understands colour theory. If I don't like that one I can pick another. Then I use it for the colour scheme for all my designs. Again, it's a cheat, but until I take a proper graphic design course or hire a designer it's the next best thing.